Finding a meeting time that works for multiple people can be challenging, especially across busy calendars. Outlook’s Scheduling Assistant helps you quickly compare attendee availability and choose a time with fewer conflicts—before you send the invite.
This guide walks reprises the KB on this subject and walks through the basic steps for using the Scheduling Assistant when creating a new calendar event.
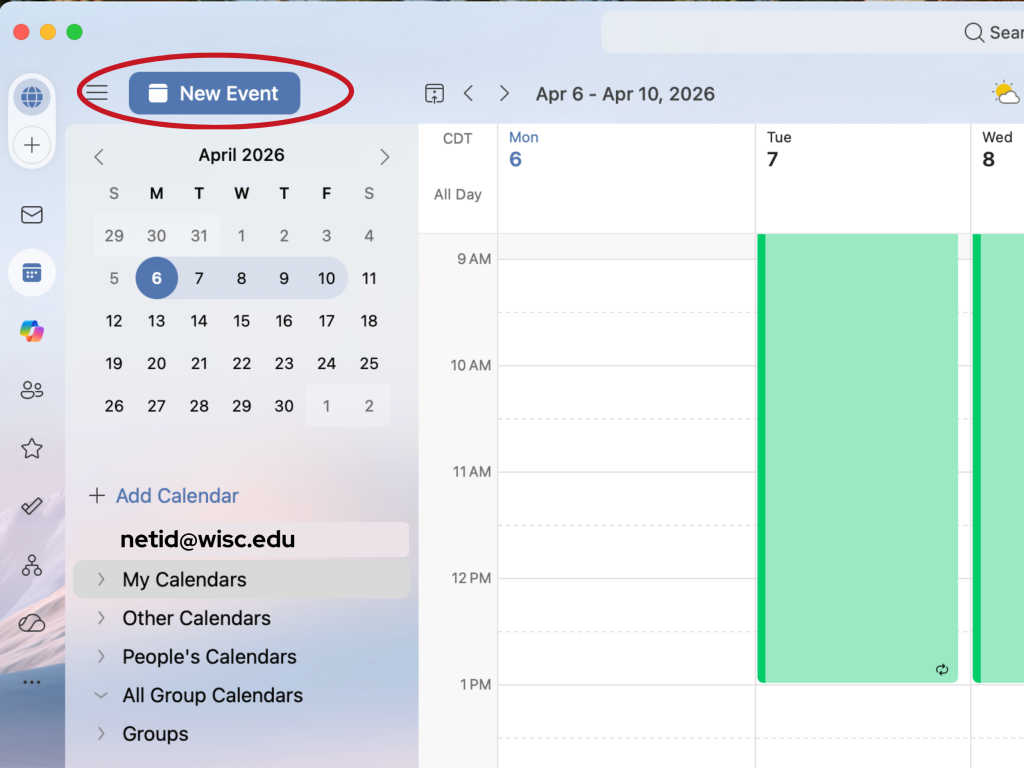
Step 1: Create a New Event
Start from your Outlook calendar.
- Navigate to your Outlook Calendar.
- Select the New Event button.
This opens a blank meeting invitation where you can enter details such as date, time, and location.
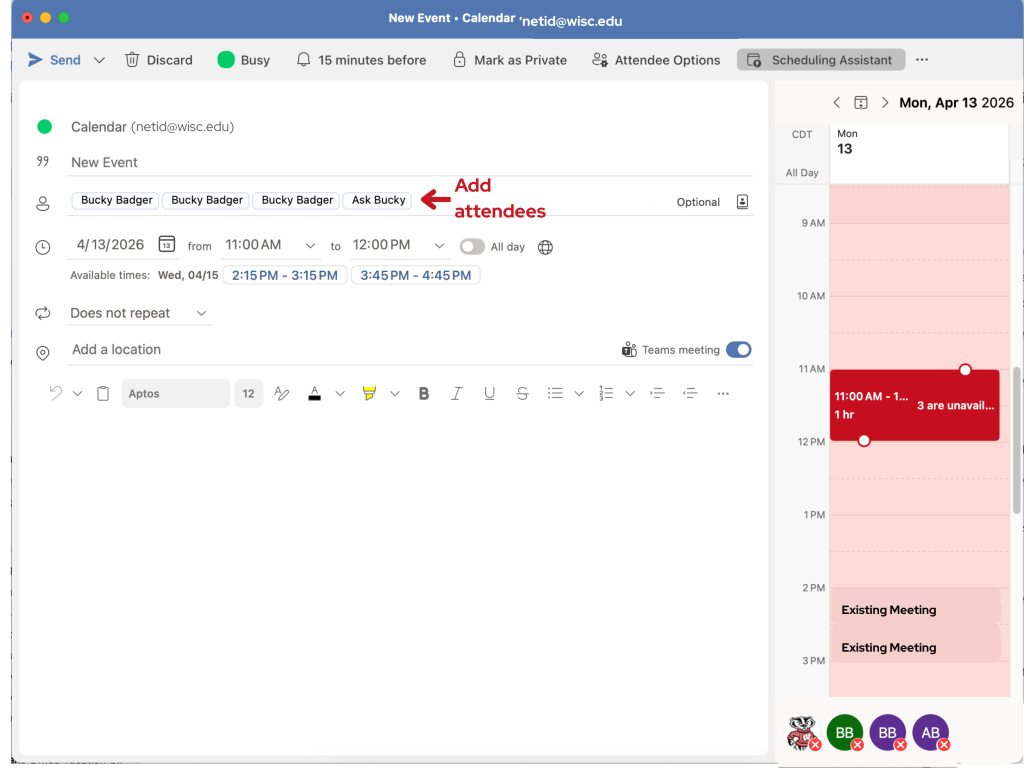
Step 2: Add Attendees
Before the Scheduling Assistant can do its work, Outlook needs to know whose calendars to check.
- In the event window, add names or email addresses in the Attendees field.
- Required and optional attendees can be added at this stage.
Outlook will use these names to pull availability information based on what you have permission to see.
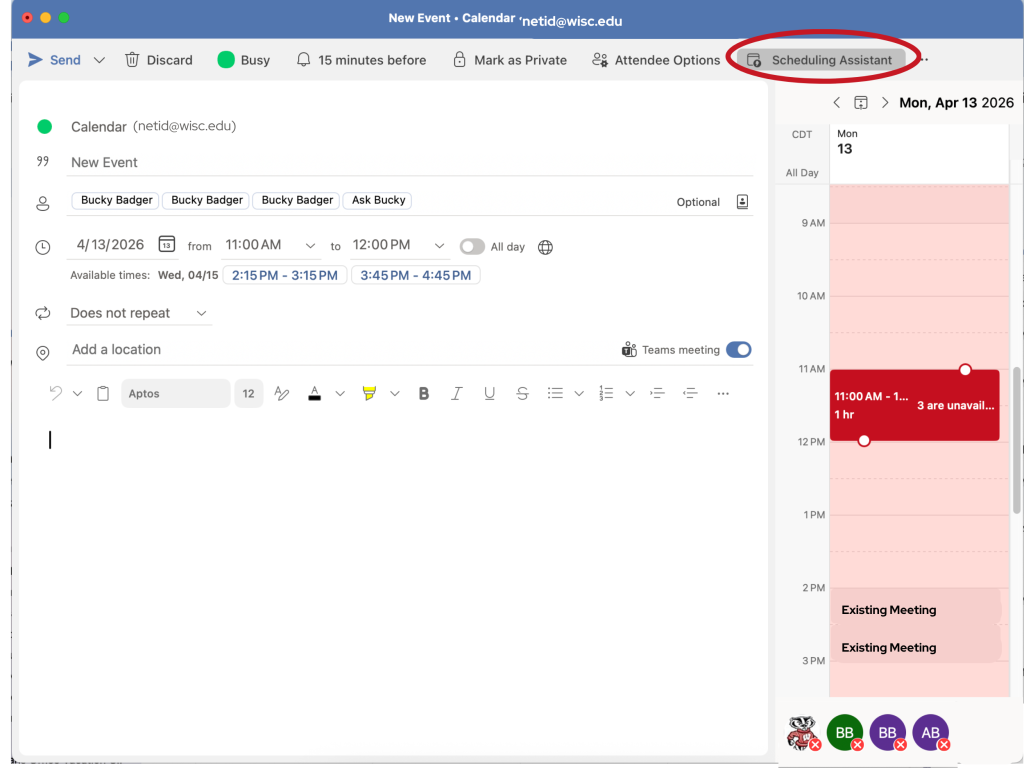
Step 3: Open the Scheduling Assistant
Once attendees are added, switch from the meeting form to the Scheduling Assistant view.
- Select Scheduling Assistant from the top menu of the event window.
This changes the view from the meeting description to a calendar comparison across all invited attendees.
Step 4: Compare Availability Across Calendars
The Scheduling Assistant displays a grid showing each attendee’s availability for the selected date and time range.
- Each row represents an attendee.
- Color‑coding indicates availability (for example: busy, tentative, or available).
- A vertical time selector shows the currently proposed meeting time.
To adjust the meeting time:
- Drag the time selector to a different slot, or
- Use the date and time fields at the top of the window.
Look for a time window with the fewest conflicts to reduce declines and rescheduling later.
